
Most important controls:
Gain & Depth
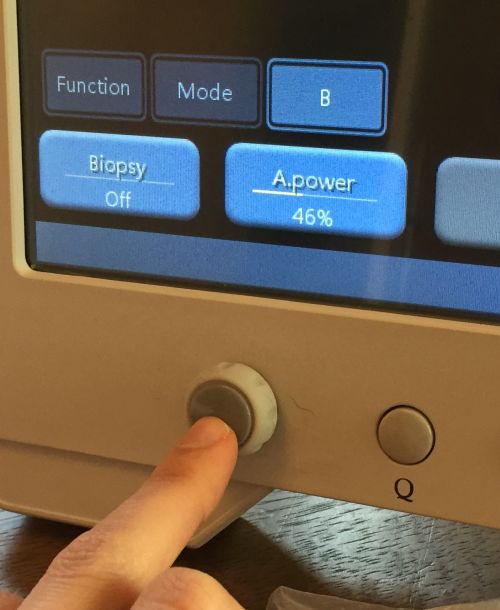
The hard button knob on the front of the Scan Pad is multipurpose. By default, it is the overall gain control. Turn your gain up and down using this knob.
If you press it in once, it will change to a depth control. After a few seconds, it will revert back to gain control, so if you wish to adjust your depth, bear in mind you need to do this immediately after pressing the button.
Most people will begin a scan with a greater depth (to 8cm, for example), and reduce the depth once gestation sacs have been identified, in order to see more detail. The ideal way of checking for foetal viability (heartbeat, movement) is to reduce your depth so that the gestation sac occupies as much of the screen as possible.
Freeze
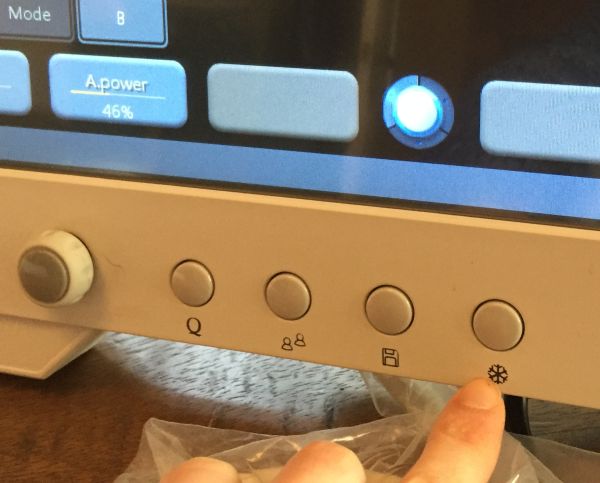
This button freezes your scan image – similar to the ‘pause’ button on your television remote. You can then use the main control knob on the front of the scanner (the same knob you use for gain and depth) to scroll through frame by frame. This allows you to go back and look at something which caught your eye, as well as to save still images and video clips to watch again later or send to your clients.
Save

The ‘save’ button will save a still image onto the Scan Pad’s internal memory, and will show you a thumbnail of this picture down the right hand side of your screen. You can also choose to ‘Save Cine’ (on screen button, bottom left). Cine clips are very popular with clients.
Other important controls:

Frequency: The Scan Pad simplifies this process, by splitting the frequency ranges into “Pen” (penetration – low frequency), “Gen” (general), “Res” (resolution – high frequency).
High frequency (Res) gives you higher resolution, so start high, and only go low if needed, i.e. if you are failing to get an image on a larger animal.
Dyn Range: Dynamic range controls the range of greys. Try playing with this (bring it right up, and right down), to see how it changes your image. Some people prefer a more contrasted image, others like to see a greater range of details. Some people also like to vary it, depending on the application – so they may desire a highly contrasted image in early pregnancy, to spot tiny gestation sacs more easily, but change to a larger number of greys in later pregnancy in order to pick up the subtle tissue differences of a well-developed puppy.
Focus Position: Very important in many machines, but the Scan Pad uses autofocus by default, so it’s not as vital to use this control on this machine. On machines that always require a manual focus, it’s important to set the focus at or just below the region of interest.
Grey Map: Again, a matter of personal preference. Experiment with the different options, and find one that suits your eye; that you find easiest to work with.

Colorise Map: This option on the second menu (press the round ‘B’ on-screen button once to navigate here) applies a superficial colour wash over your image. This can help the eye to detect subtle detail that would otherwise be missed in a greyscale image (the eye is very sensitive to movement in black and white, but less sensitive to detail).
Exporting your images
You can export your saved images immediately after finishing your scan, by inserting a USB stick, selecting all your thumbnail images and videos from the right hand side, and clicking the ‘export’ button at the bottom (beside the ‘delete’ button, so be careful!). Alternatively, you may wish to export several scans at  once at the end of the day. On the Scan Pad, you do this by clicking the “patient” button, then going to “patient list” and selecting the patient you require. Don’t worry that you didn’t create a patient before beginning your scan – your machine will automatically assign an ID for all your clients.